
Running a Mac can be daunting at first, but once you get the hang of it, you’ll be saying that it’s the best machine. Because of the amazing features and highest defense against malware, MacBook is the top choice for developers. However, many newbies who have migrated to Apple from Windows find it challenging to adjust to the Mac OS. Because of the difficulties that most new Apple users face, today, we’re going to answer a prevalent issue that most newcomers face, i.e., how to screenshot on Mac.
Let’s talk about the different ways using which you can do it. Although screenshotting on Mac isn’t as hard as it may seem, it takes clicking a few here and a few there. But most people don’t know how to do it, and even though Apple has made it relatively easy in its latest macOS, most people don’t have the latest macOS.
Screenshot on Mac Basics
Unlike Windows, there isn’t any dedicated button for capturing the screen on Mac; you have to give few different commands for taking a screenshot on your mac, depending on the model. However, after the macOS Mojave release, the fifteenth major update of the macOS, macOS’s working significantly changed.
How to screenshot on Mac before Mojave
If you’re still running your Mac on OS older than Mojave, then the options for capturing your screen are as follows.
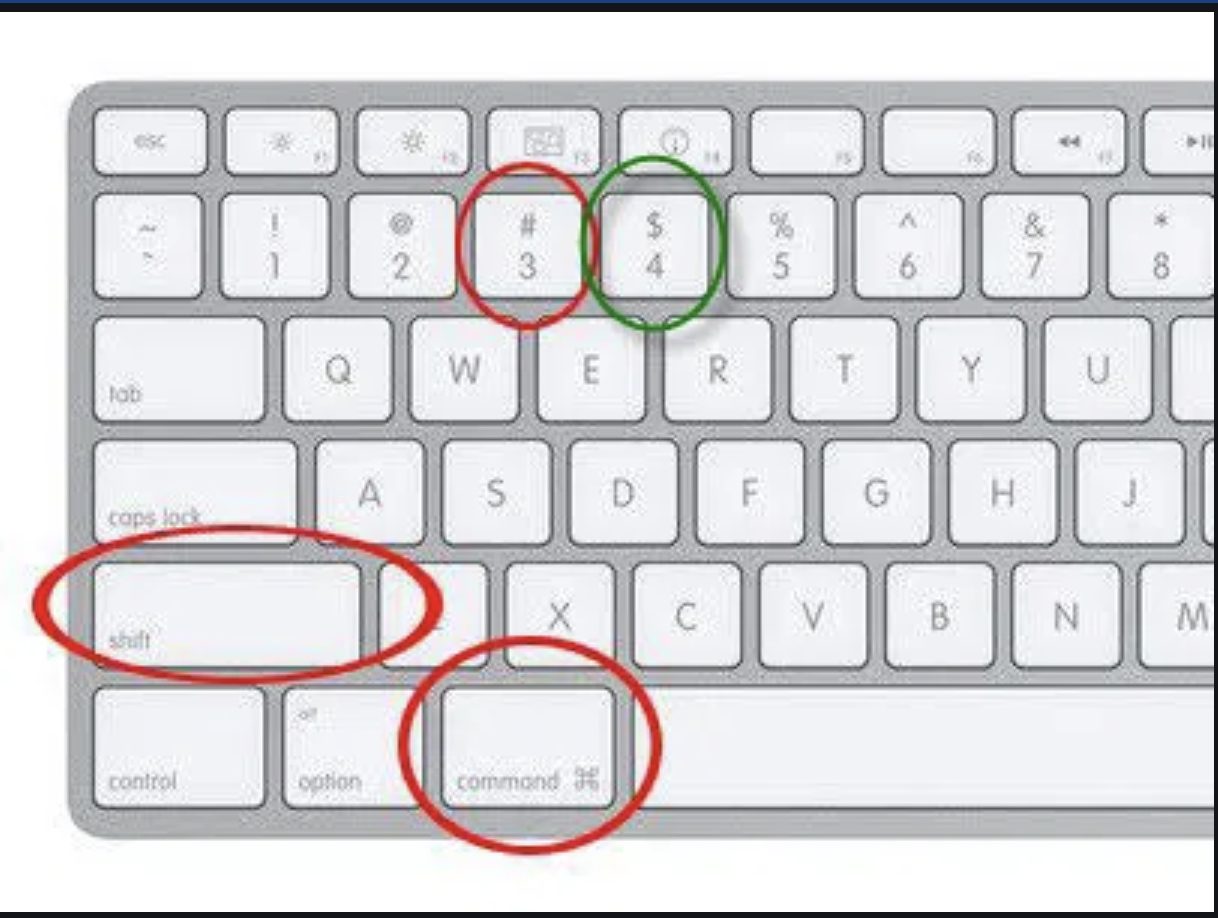
- ⌘ + Shift + 3
- ⌘ + Shift + 4
The first command allows you to capture the entire screen at once. However, if you’re using more than one screen, you’ll have to capture each screen individually.
The second command enables to capture of a specific part of the screen rather than the entire screen. You can easily select any specific area you want to capture and take its screenshot using this command.
Screenshot on Mac after Mojave
Even though the commands mentioned above still work for Mojave users, in this latest update, Apple has introduced a screen capturing menu to capture or record the screen as you like.
Use ⌘ + Shift + 5 to pop up a menu bar if you’re a Mojave, Big Sur, or Catalina’s user. The menu will give you the following options from which you can choose.
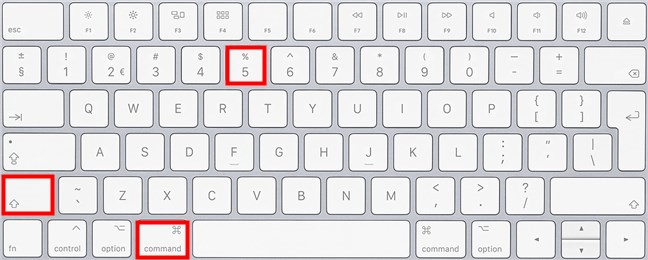
- Screenshot entire screen
- Capture selected windows or parts of the screen.
- Capture a particular screen.
- Record complete screen.
- Record a certain portion of the screen.
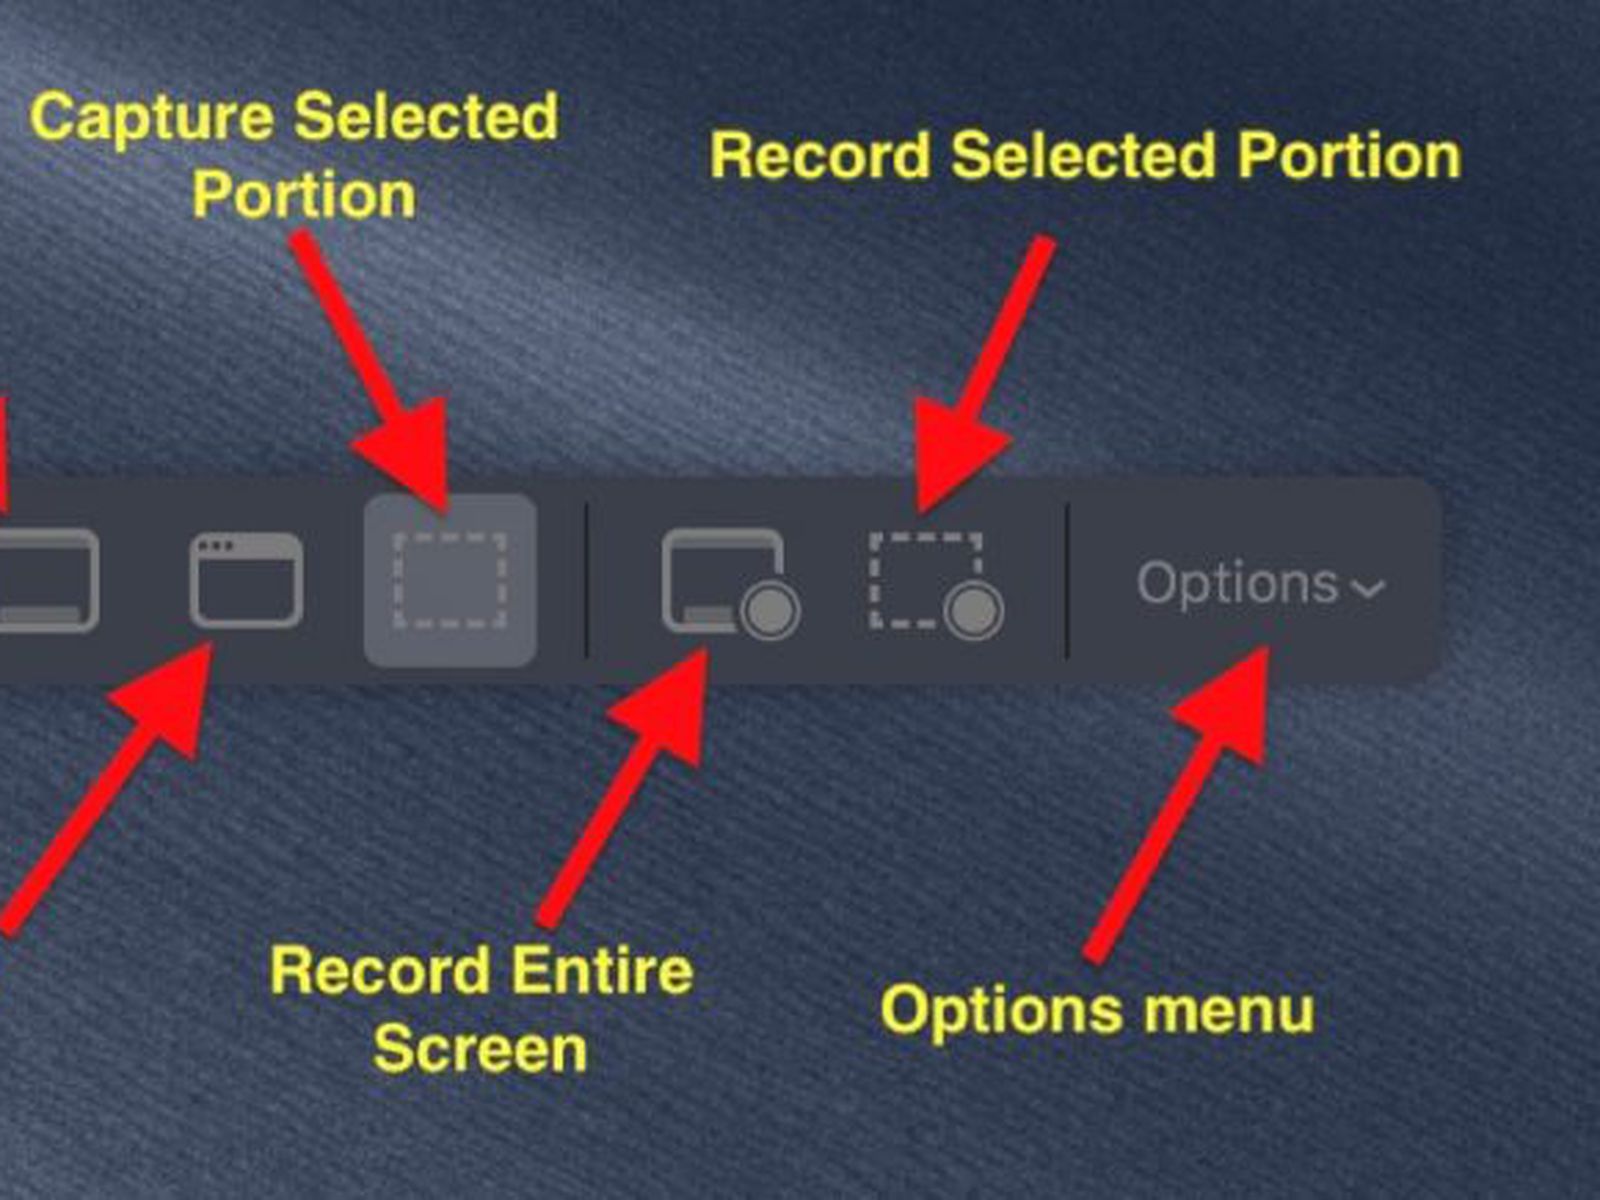
Other than these options, this menu also gives you the chance to select the storage place where you want these screenshots and recordings to get saved.
Take Screenshot Using Third-Party Apps
Another popular option that many people use to capture the screen on Mac is by using third-party apps. Because for some people, even the new screenshot menu isn’t enough. Because even with the new menu, there isn’t any snipping tool available for mac.
Many good third-party apps give you the freedom to take screenshots of your screen as you like. For instance, tools such as the CleanShot X allow you to capture the screen and help you in hiding everything on your desktop. Even if you don’t want to complete but blur the other apps, it allows you to do that. And the best part is that this app can synchronize with your iCloud.
Likewise, if you’re looking for an app that can redefine your screen recording experience, then Capto will be right for you. This app not only allows you to record your screen or take screenshots, but you can also easily edit the recorded clips using it. It comes with a built-in iMovie-esque interface.
Also Check: Doodle for Google
These apps also allow the users to add subs in the screen recordings. Moreover, the built-in screenshot organizer also helps you in properly maintaining your screenshots and recordings.
How to Take a Screenshot of your Macbook Pro Touch Bar
Just like the rest of your screens, you can easily take a screenshot of your Macbook Pro’s touch bar also. To take a screenshot of your touch bar, simply press ⌘ + Shift + 6. The screenshot will be taken and automatically saved on your desktop.
You can easily access it using your iCloud drive whenever you want. Similarly, when you take a screenshot using this command, your screenshot automatically gets copied, so if you want to add it to your clipboard, paste it there. But do keep in mind that data pasted on universal clipboard only remains there for some time, after which it automatically clears it.
These are three of the easiest ways using which you can easily take a screenshot on Mac. However, if you possess a Macbook Pro 2016 and later models that come with OLED screen bars, screenshotting them is different.